Blog

The real-deal test drive.

Today we headed up to Schweitzer to snowboard with friends for a few days. On the way we stopped in Spokane to get some supplies. The first five hours of the drive was fine. Some rain and snow, but mostly clear roads. I say mostly clear, but we did pass a semi on its side in what was clearly a recent wreck. Sara actually got some work done on the way.

Dual screen at 60mph? That’s high tech!

One of the many wrecks we passed heading in to Spokane.

In Spokane we first picked up some plywood in sizes we can’t get in La Grande…at a store with plywood in the name. Can’t go wrong there. We also picked up another piece of exotic wood for our counter-top, but that is the subject for another a post.

Then we went to a West Marine for a bunch of marine-grade wire. Hopefully that is enough for our electrical system.

Finally, we stopped at…

???

Yeah, say that out loud a couple times!

When we left Spokane the drive was much more challenging. It was after dark and the rain/snow was really starting to come down. In these conditions it was about two more hours to the mountain. The last hour and a half was pure snow on deteriorating roads. The van handled it all like a champ. No slipping or sliding.

Dark. Snowing heavily. Snowy roads.

The final ten miles or so is significantly up the mountain. I passed the signs that said “Chain Up Area,” but I questioned that decision all the way up. The switchbacks were quite steep with significant accumulated snow and I kept expecting the rear-wheel drive van to slip out, but it never happened. It made it up like a champ.

More wall, more electrical, time to go snowboarding!

We are heading out tomorrow for our first snow trip of the season to Schweitzer in Northern Idaho. Our friends Aaron and Wendy, their two kids, Aaron’s sister and brother in-law, and their kids will all be there for New Year’s. It’s going to be a full house! We are excited to see them all because it is has been quite a while and our friendship with Aaron and Wendy goes way back and the last time we really partied with Aaron’s sister and brother in-law was New Year’s 1999 when they were all childless! Boy, a lot of things have changed since then!

In preparation for our trip we wanted to get the walls in. In order to get the driver’s side wall in, I wanted to finish up running a couple electrical items. First, the set of four bedroom lights needed one tweak and then to be secured with some type of wire clamps. I also wanted to run an empty conduit from the front where the electrical system will be housed to the rear pillar. You never know what you might want to run later! Sara has been working on the walls with stain and poly so there were almost ready to go.

Boring picture, but this is where the lights will drop through the wall. The refrigerator/microwave cabinet will be right in front of the bed so the switch for the bed lights will be set in it, right in front of Sara’s head.

The conduit set in the rear pillar. There is an access panel on the door side of the pillar and I was able to squeeze my hand in there and grab the conduit. (I remembered to run a string through the conduit first so I can later pull a wire through!)

In some places I used a simple adhesive-backed wire clip to secure the conduit.

In other places I used a sticky pad through which you can insert a zip tie.

Generally I found the zip tie solution to work better because sometimes the wire clip broke. The adhesive on both is quite strong. In a few places I still added a little gaffers tape just to make sure the empty tube doesn’t bounce around.

Once that was all done it was time to put in the first wall. As I mentioned earlier, the driver’s wall was done in one piece because we had already removed the bed.

One and a half walls installed, the bed platform reinstalled, and the van all clean for our trip. The other half of the passenger wall needs another coat of poly so we didn’t put it in yet.

On our way through Spokane we also plan to pick up some more 1/4″ and 3/4″ baltic birch plywood (we can get 1/2″ in La Grande). We also plan to hit West Marine for some more wiring and electrical supplies. Nice to have an excuse to be going through a big city.

We are snowboarding for three days and I think we packed just about all the snowboarding clothes we own. Our stuff was piled next to the back door and my mom asked, “Are you sure you have room for everything?”

??????

Seriously, mom? We have an empty cargo van! I’m pretty sure we can fit our snowboards and snowboarding clothes!


A new wall and rewired lights.

Today we worked on getting the driver’s side rear wall installed. With the bed off things were easier so we did not cut the wall into two pieces. It still required quite a bit of in/out of the van because we had to make a few cuts and  line up holes multiple times. This kind of work also inevitably leads to some minor problems – in this case we had some plus-nuts that were messed up in some fashion so we had to add some new holes as well. It is never particularly difficult, but what should take an hour or so ends up taking 2 or 3 hours. Sara also cut the reflectix so we have the whole thing insulated as soon as the wall is ready for a final fitting.

If this picture looks familiar, it is because it is exactly the same as yesterday’s picture. I forgot to take a picture of our new wall today so here is a mirror image of the opposite wall from yesterday.


Sara also started putting polyurethane and/or stain on both of the walls. A camper van is not exactly the driest atmosphere and we want to make sure none of the wooden panels absorb moisture and rot/mold/mildew/etc. On my Ace trip today I picked up some additional bolts called truss bolts – essentially round-head bolts but they have extra large, shallow heads so I think they will work well for bolting on the wall. Normally I try to counter-sink any bolts, but the walls are only 1/4″ baltic birch plywood so there is no depth in which to counter-sink a bolt. These have plenty of surface area to hold the wood but they also sit fairly flush to the wall. They are sure a lot shallower than a normal bolt/washer combo. I randomly found them one day while looking at things in the hardware department at Ace. It is really amazing what all those little drawers hold!

We also rewired two of the factor LED cargo lights. As with any vehicle, lots of lights go on when you open the door. We don’t necessarily want that! Most of the lights are too bright and would be covered anyway once we are done covering the walls, but we do think it would be handy to have some light when we open the back door as that area will not be near any other lights. Our solution was to rewire the factory rear van lights to go under the bed.

This is a look back at how the lights were originally installed in the arch above the rear door.

We had previously popped the lights out of the back wall and they have just been hanging on the wires. We cut those wires and added about 10′ of wire so we could run them down the pillars on either side of the rear door, out a little access hole and up the rear bed posts. At some point we will figure out a nice way to attach them to the post. This will give us light in the storage area under the bed whenever we open the door courtesy of the van electrical system. I suppose it will also be a good indicator if a door is not completely closed.

Splicing our new wire to the original wire.

Taping up the wire that will run down the wall. We put friction tape on the entire length.

Sara did some crimping, too. Here she is about ready to plug in her light. We just kept the stock connectors and added them back in to the end of the new wire so they fit right back on the OEM lights.

The faint red lines show the path from where the lights were to were they are now. They actually run along the wire harness to the corner, then down the wall to the bottom, into the pillar at the back, and out a hole next to the bed post. The wire whole fan wire harness will be reattached to the walls once everything is built up around it.


Boxing Day progress.

Not a ton of van progress today, but we got some work done to get back on track.

The morning was spent dealing with snow from yesterday’s storm. This was our Christmas present to Dad.

To be clear, we did not buy him a new snowblower. Our gift to him was to convince him he really needed a new snowblower, and boy did he. His old machine was about 20 years old, it was single-stage, the chute did not even turn any more, and it only ran on half-choke. I am seriously impressed he managed to keep using it because I was fed up with it after only a few inches of snow!

He really started to get the hang of it.

He does, however, need to learn a little about how far it shoots snow. Some lady came up his driveway to tell him he was shooting snow on the road below and he nearly hit a car with a rock. Then I looked at the front of the house. Good thing there were no rocks on the driveway!

When we finally got focused on the van, I spent a while installing some final bolts on the solar system while Sara did a pretty massive garage clean-up so we could keep working. With the bolts installed I don’t think there is any more reason to get up on the roof. Sara also kept putting in more plus-nuts while I made an obligatory Ace run, then we put in our first wall. It actually took quite a while because we had to measure and cut multiple times (e.g. we kind of forgot the van wire harness that needed to be accommodated), then we had to do our trick with the hanger bolts to figure out where all the holes will go. It did work well, though, so we have our first wall temporarily in place. We still need to stain/poly it and run a couple more wires, but we are excited to have some visible progress.

We had hoped to get the wall in without removing the bed, but that wasn’t to be. As long as I had a couple bed posts out I modified them so they can be removed a little easier in the future.  Our original method required either access to the back side of the floor bracket or to remove the whole bracket. Instead, I forced some stainless steel t-nuts in the back so we can now drive a bolt right through the entire post. This will allow us to remove the post from the bracket with only a wrench on the front.

A final picture to amuse those of you in New England used to salted roads and prompt plowing. Driving down the main street in La Grande today reminded me that not all snow-removal budgets are the same! I have no idea why the city had not even bothered to plow downtown for over 24 hours after the storm because I did see a few roads plowed in places, but downtown it was still up to 6″ of snow and now thick packed ice. That’s not going to be clean any time soon!


Merry Christmas and review of Christmas Eve.

It was fun waking up in the van this morning. We were both so excited to get a feel for spending time in the van and it really felt like our own little cabin, complete with a Christmas tree! Last night was our first real night in the van, even if it was still parked in the driveway and plugged in to the garage via extension cords running through the passenger window. While the van is far from finished, we slept in our bed, had a heat source and lights, and the dogs were with us. That’s pretty much the real deal! We slept great. We were a little worried that the bed would not be long enough for me or wide enough for both of us, but it was great. It was definitely not as soft as it felt in Ikea – I suspect so many people try out the mattress toppers there they get worn down – but was still quite comfortable. At most we might add another layer of thin egg crate foam to soften the top.

The temperature during the night was great. We had the electric heater going and our fan venting on low speed. With our down comforter Sara actually complained she was too warm in the morning. The heater was blowing more in her direction, but I think she was exaggerating. The temperature difference between the bed (36″ up in the air) and the floor was pretty significant. Good thing the dogs have thick fur coats and comfy beds to keep them warm. One thing we definitely learned is the importance of finishing the toilet cabinet. Someone, and as a gentleman I won’t say who, needed to make a pit stop in the middle of the night. Good thing the yard was so close by!

As you can see, it kept snowing overnight and we woke up to a few more inches of white Christmas.

We had a nice family morning opening some presents and having breakfast. I have always wanted a Jetboil because they are made near where I worked in Manchester, NH, and my dad got us one for Christmas. It could come in handy in the van if our electricity ever fails and we want something hot for breakfast. We also got some other van related gifts – outdoor blankets, some gift certificates, and some more solar accessories. Thanks to everyone for the gifts!

In the early afternoon we went out for a family Christmas snowshoe.

Poor Kenai gets major snowballs (snowboobs?) when he plows through fresh powder.

Kenai never not working. He found us this delicious(?) rabbit. We don’t think he caught it, but he retrieved it like a champ anyway. Hopefully the hawks or coyotes will enjoy the Christmas dinner we left for them.

2017 Family Christmas Photo in the van!


Merry Christmas Eve from the van!

Not a lot of work progress today. I made a couple trips to Ace for supplies anyway because I thought they might miss me. We worked a little bit on the walls and we will be more ready to put up a wall in the next couple days. I also have the final supplies to install the toilet cabinet.

Sara spent much of the day making cookies and cinnamon rolls.

We also decorated the van. We put lights on the tree and hung a string of copper LED lights. Sara put up her insulated window covers (including material we brought back from Tanzania years ago).

The van looks beautiful…so we are going to spend the night here. That’s right, this is my first blog post from inside the van! It is not technically our first night sleeping in here, but it is our first night in a real bed (i.e. two mattress toppers from Ikea).

The tree fell over on Kenai while we were setting up so he was ready to hit the road without us.

Poor Tanzi got all excited to go for a walk and then slipped on the ice. She smacked her chin really hard and it was bleeding so she got extra sympathy and was allowed to spend the afternoon on my parents’ couch.

Now we are all tucked in the van for the night hoping Santa Claus will bring us a finished galley cabinet in the morning!

Merry Christmas Eve video tour from the van!

One problem solved.

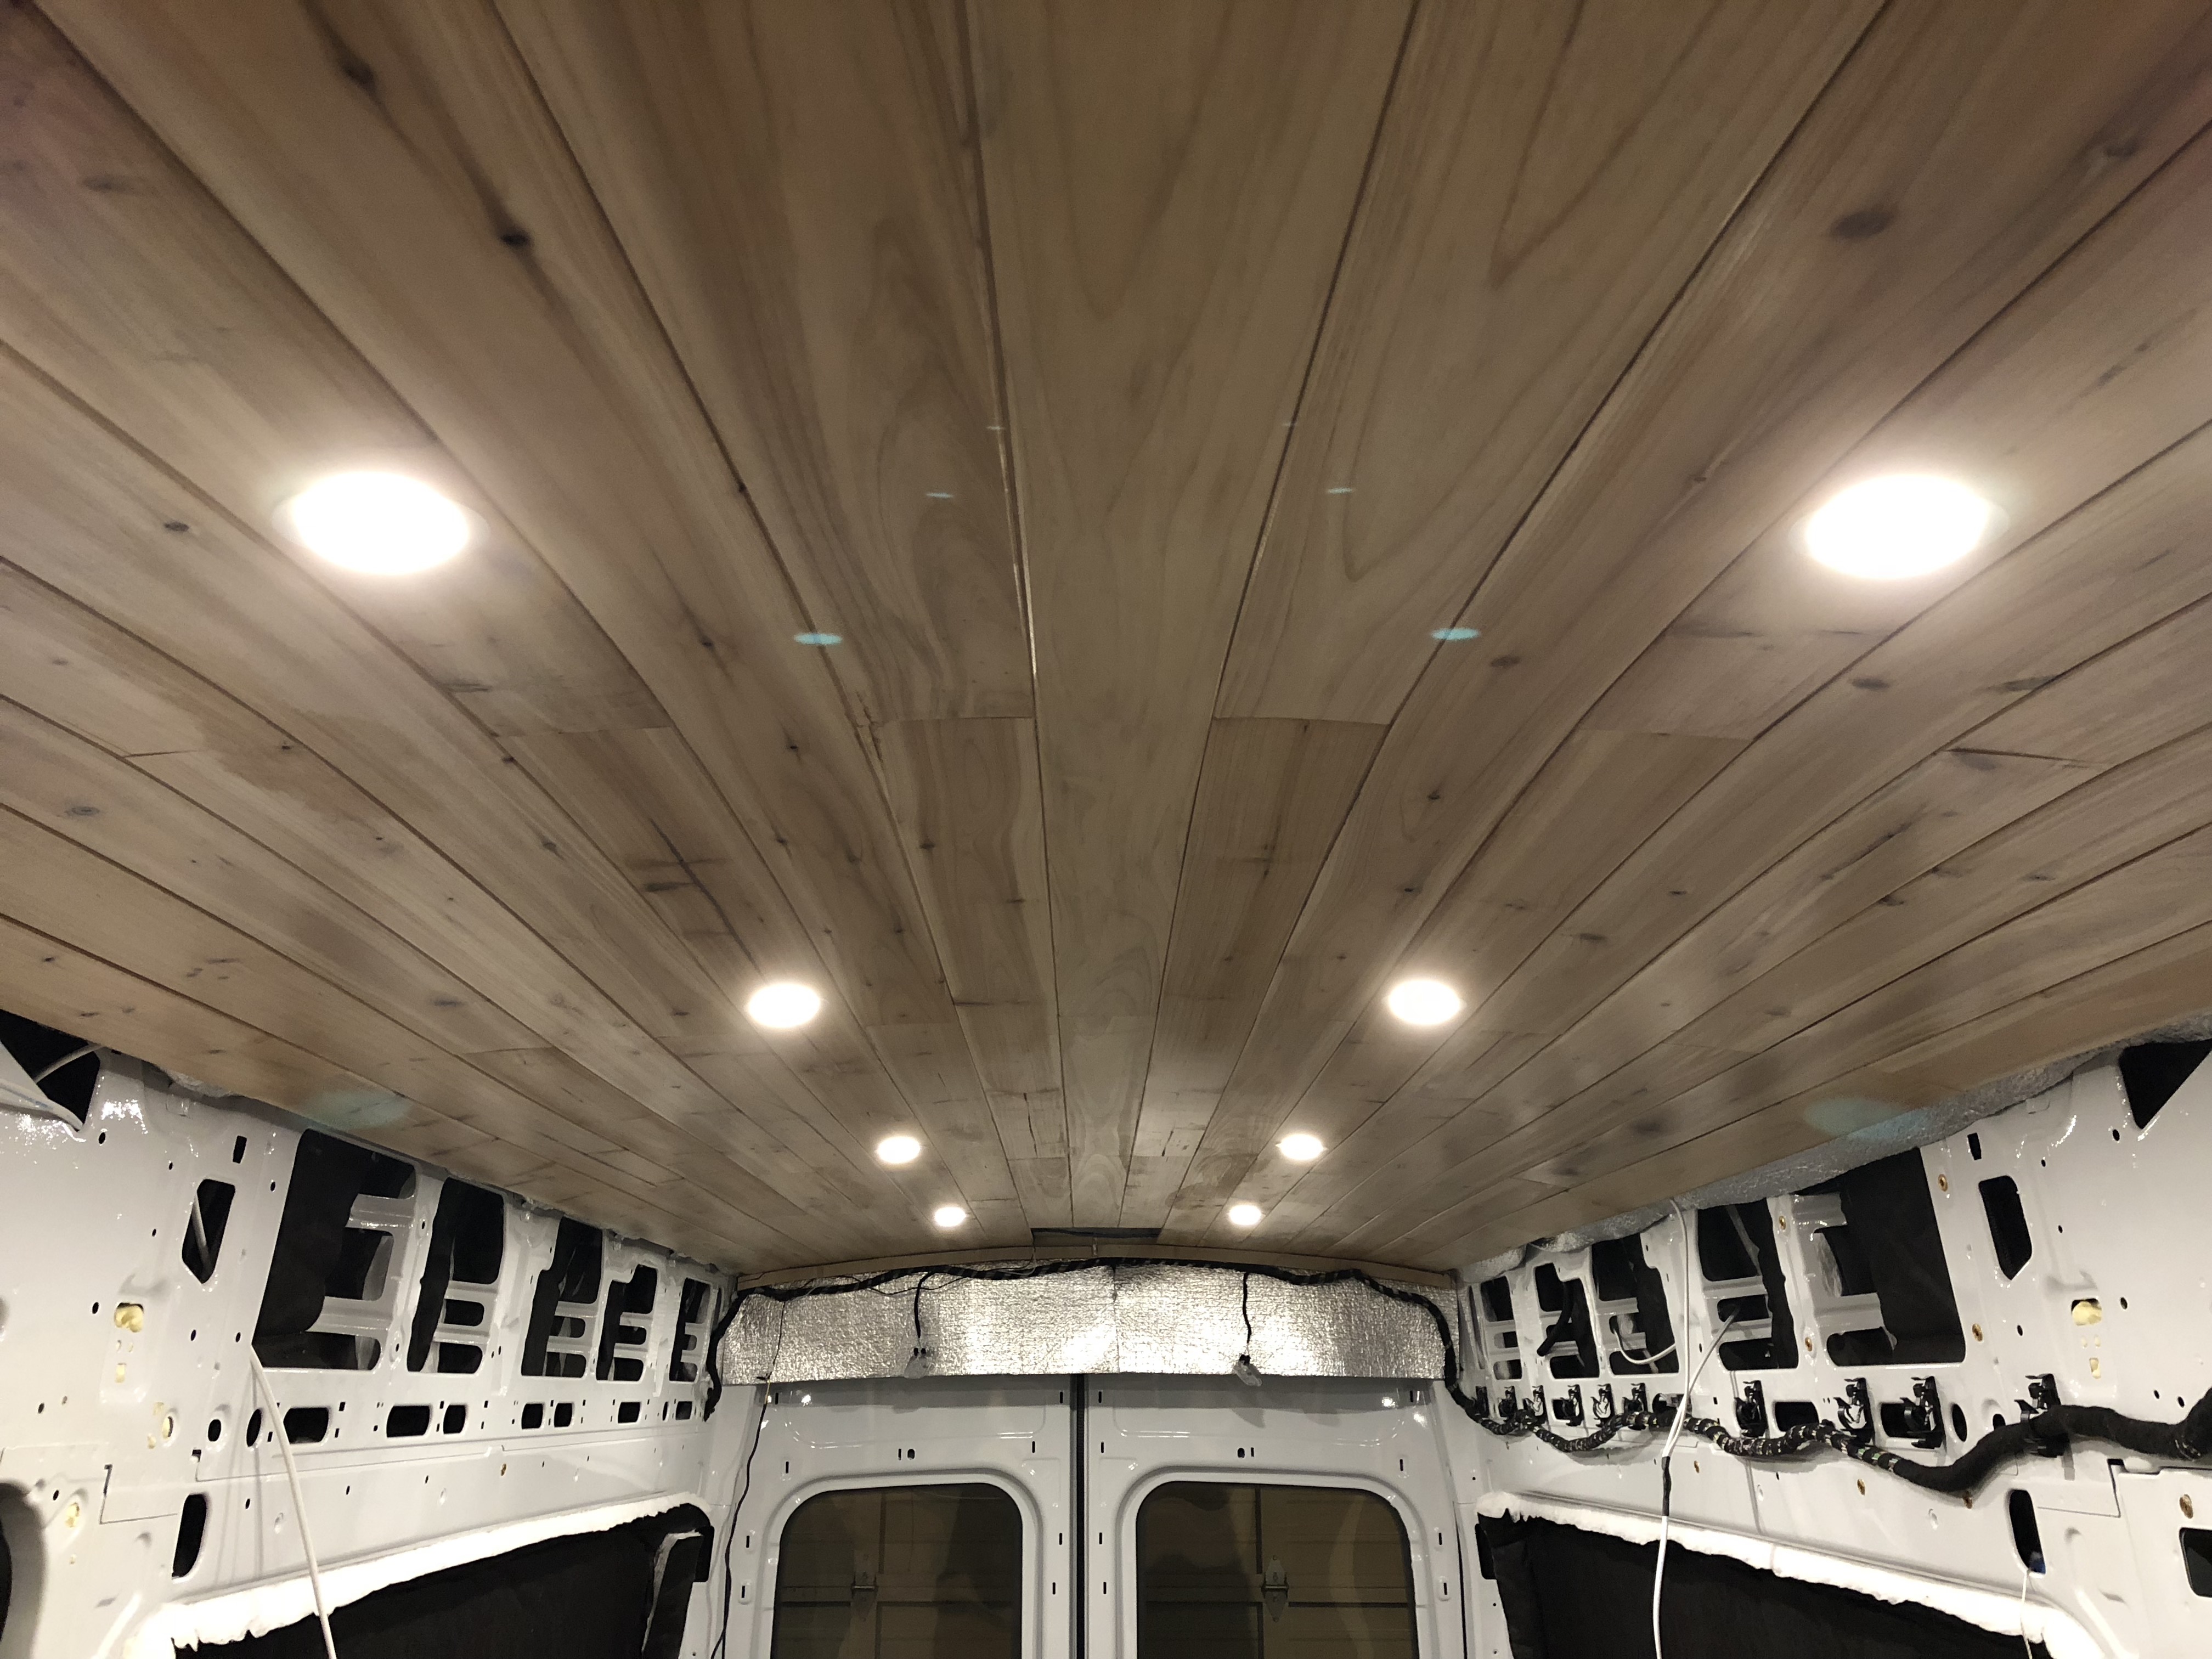
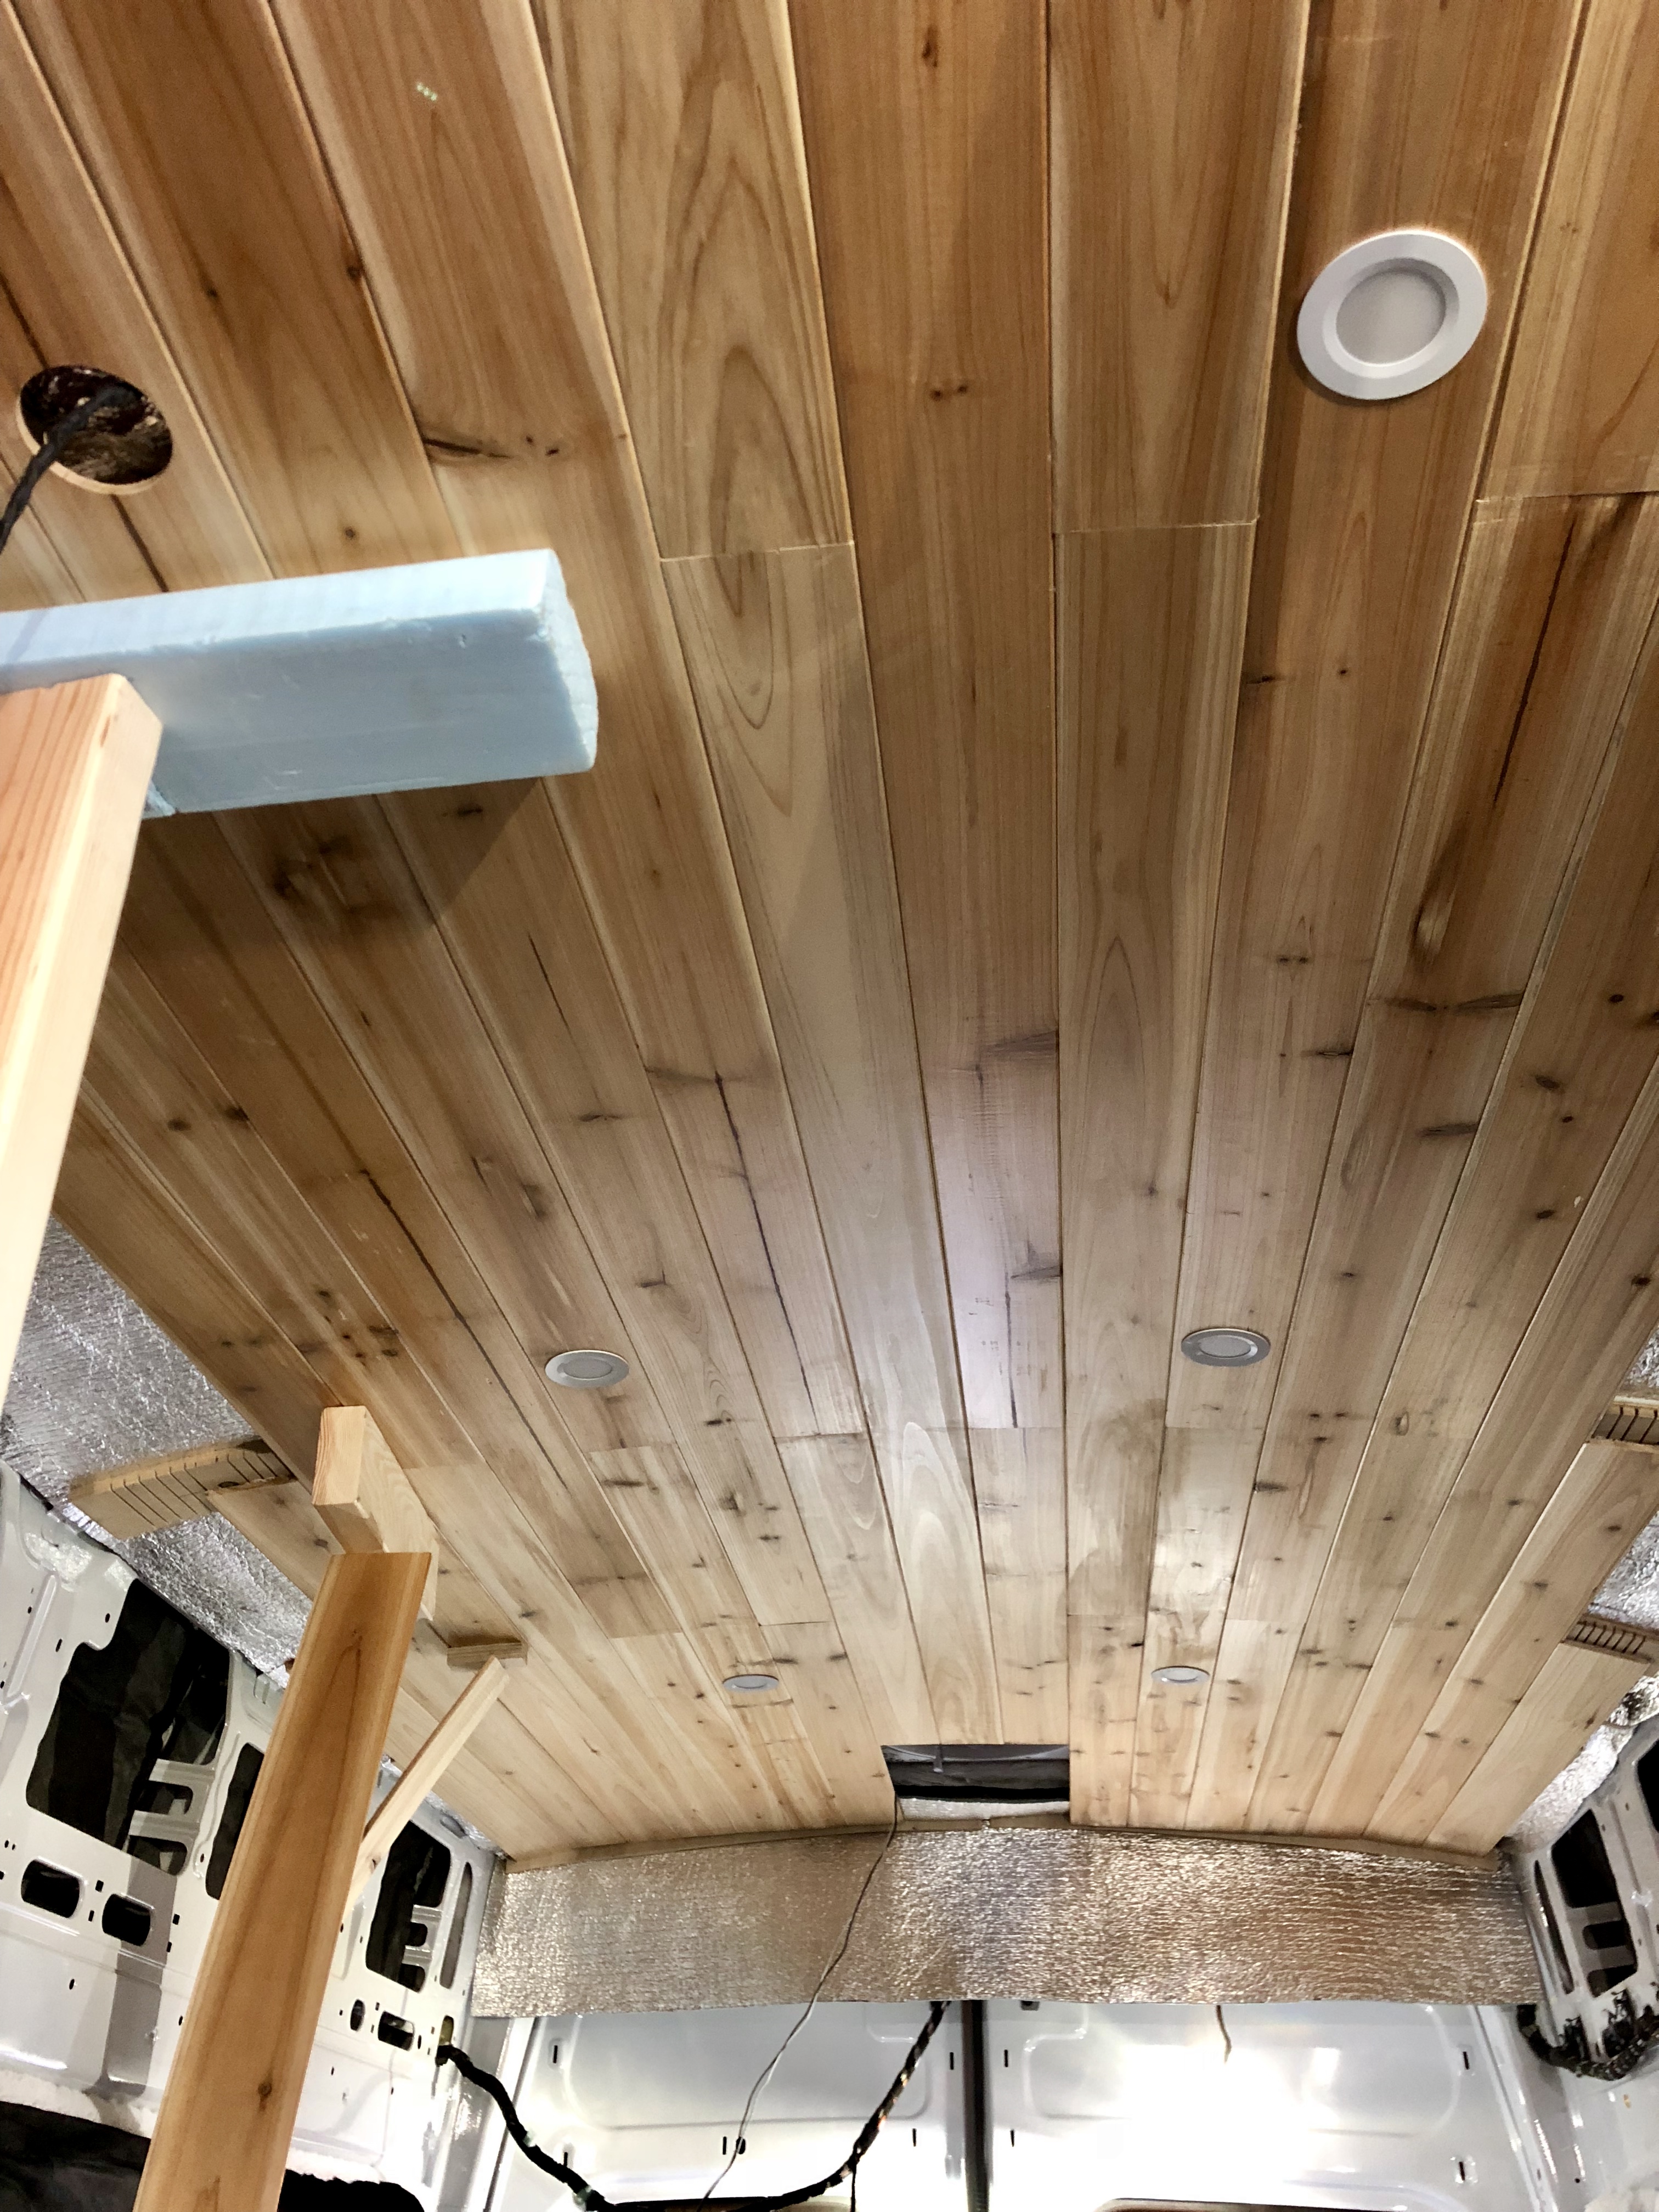
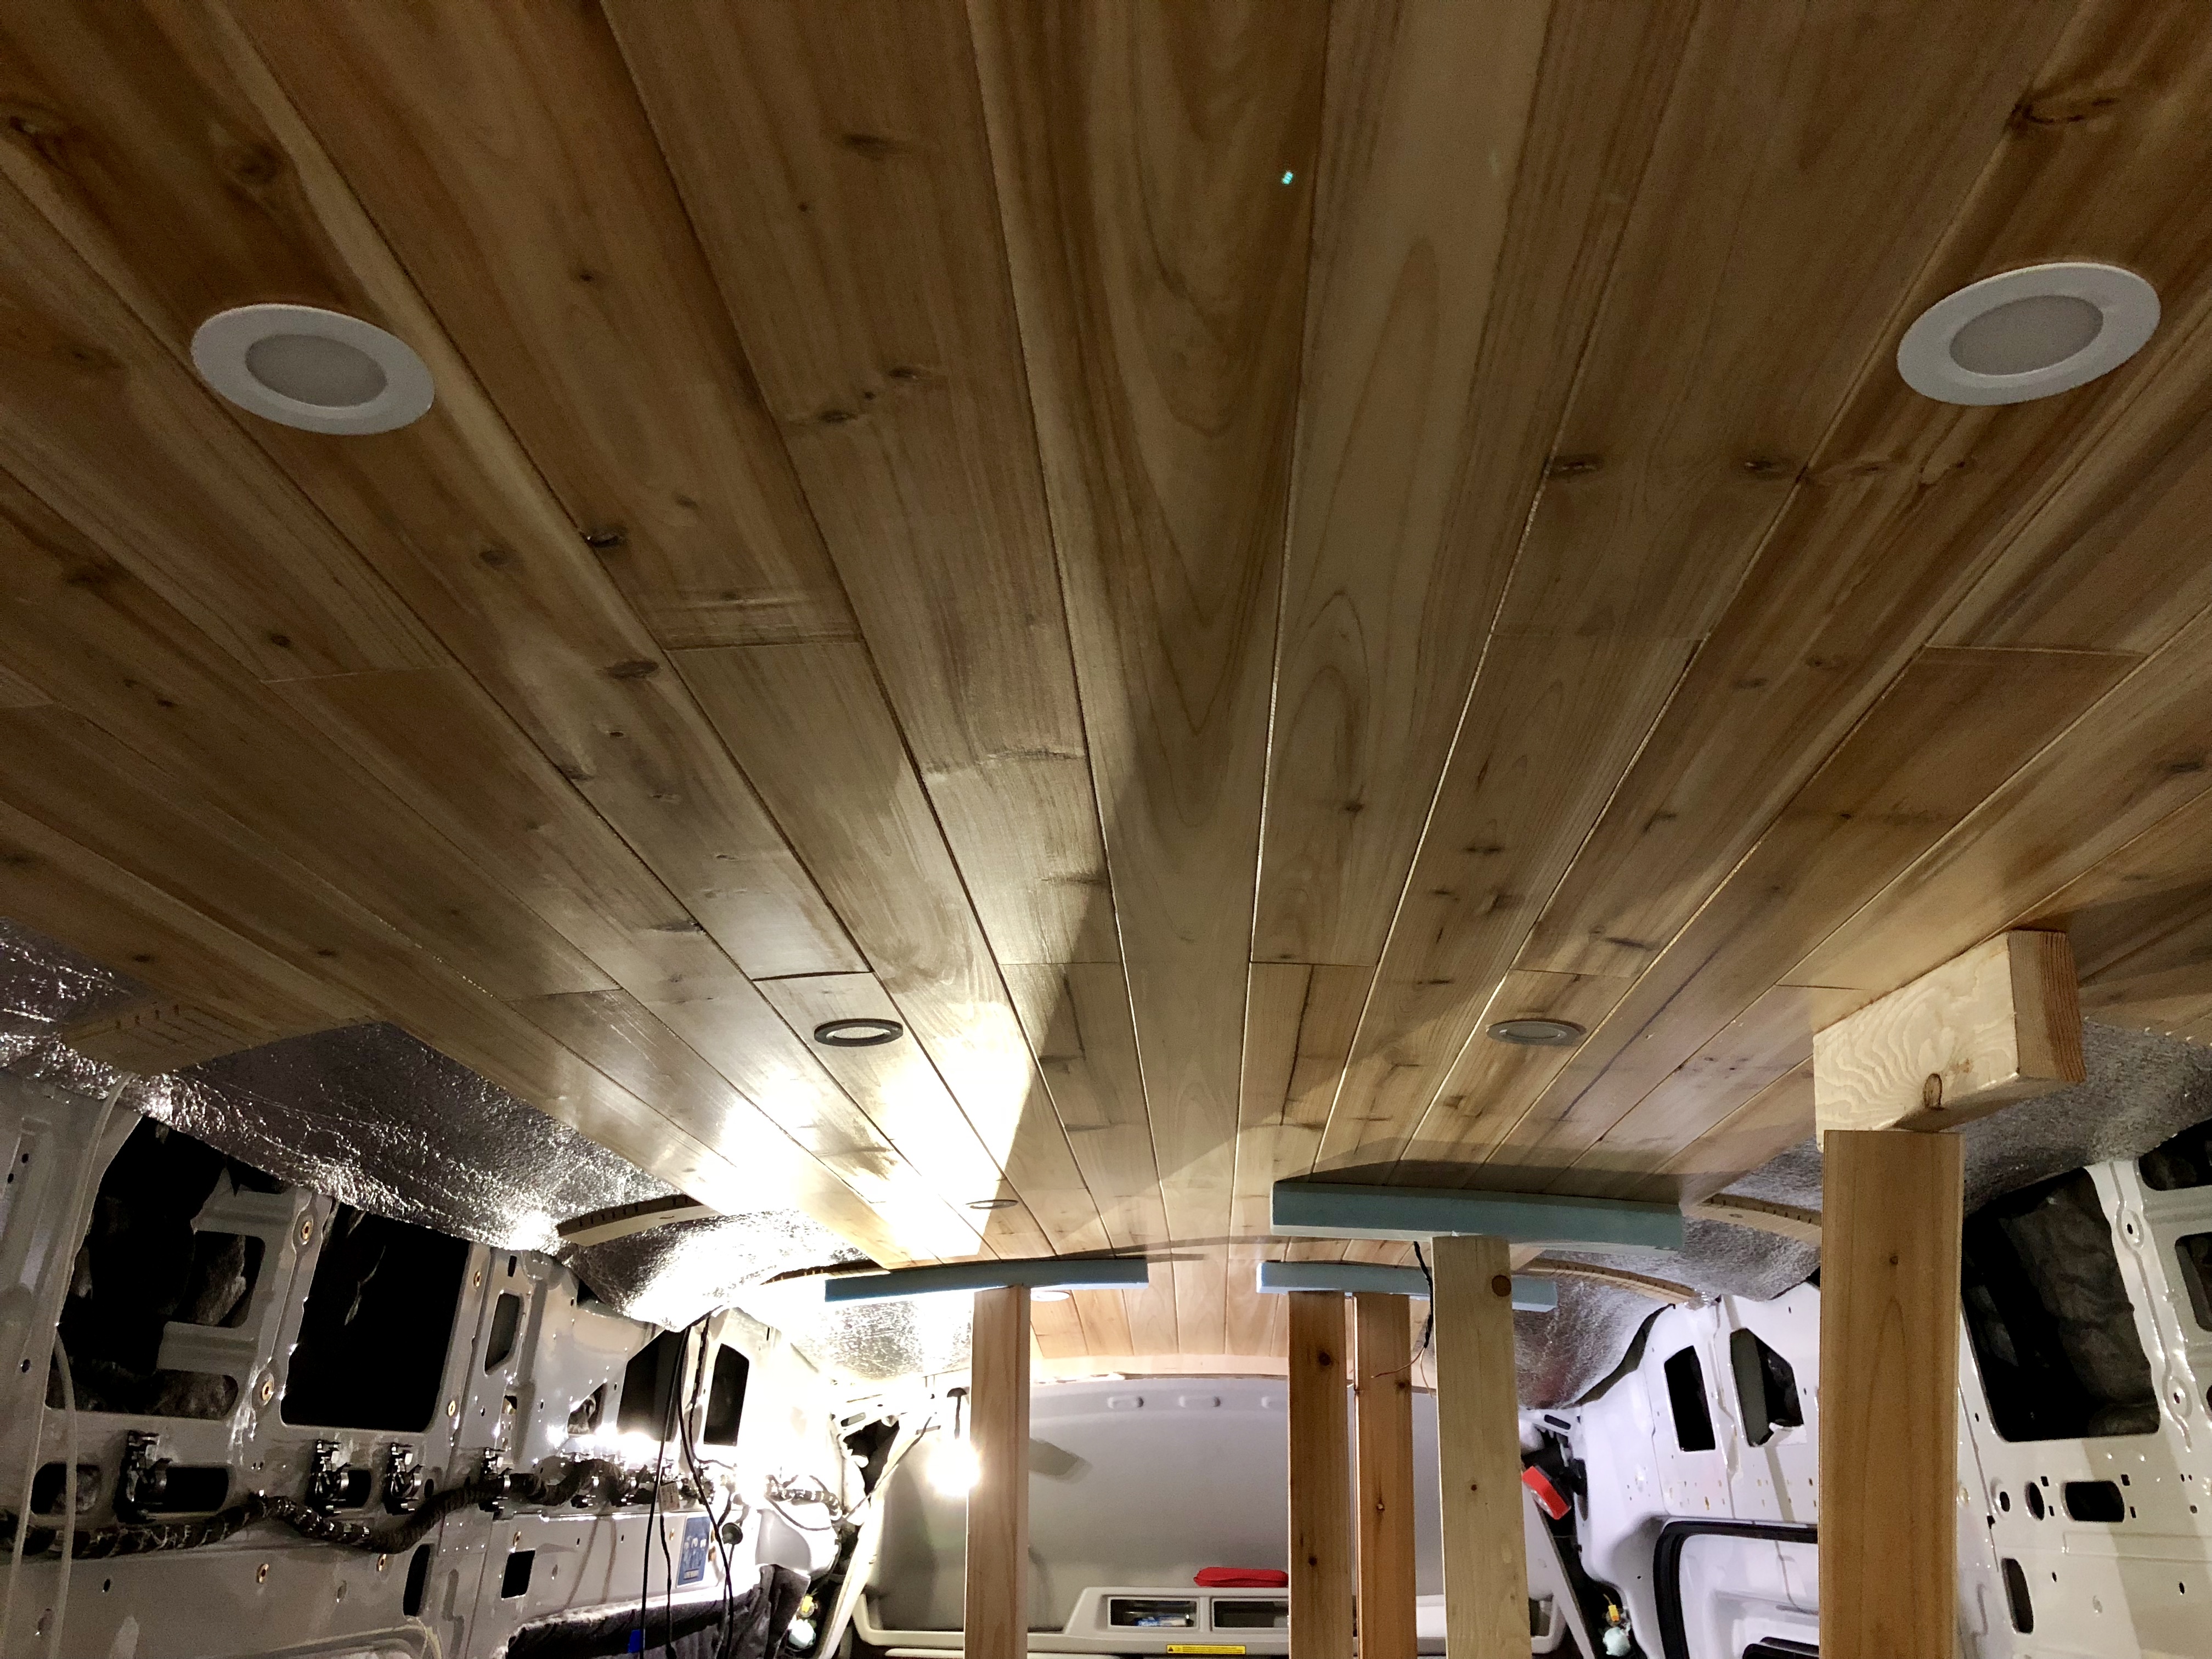
We had been debating how to bridge the large opening in the wall. As you can see, there is structure above, below, and on the sides, but the middle has nothing to use for attachment points. The van wall curves up there and as our bed posts are fairly high, they push into the curve a little so we needed a solution that didn’t take up much space. Above the bed we will eventually put in side cabinets so we don’t need anything fancy.

I forgot to take any good before photo, but here is an earlier picture showing the gap – the large black space in the back.

People do all kinds of different things, which usually involve some sort of wooden furring strip(s) running horizontally or vertically. Today we finally set to figuring out how we would solve it. The goal for us was to do something as rigid as possible while not taking up much space.

The gap is just over 8′ wide so most conventional lumber won’t fit. We did pick up a 1″x4″x10′ board to test. A 1″ board is actually 3/4″ wide so it would push that much into the bed. It might have worked, but we weren’t convinced. It also would not have left much room for any type of wall.

I also picked up two lengths of 1″x1″ L-angle aluminum stock. I thought that by joining the two pieces together it would make some pretty rigid, but it was still surprisingly floppy.

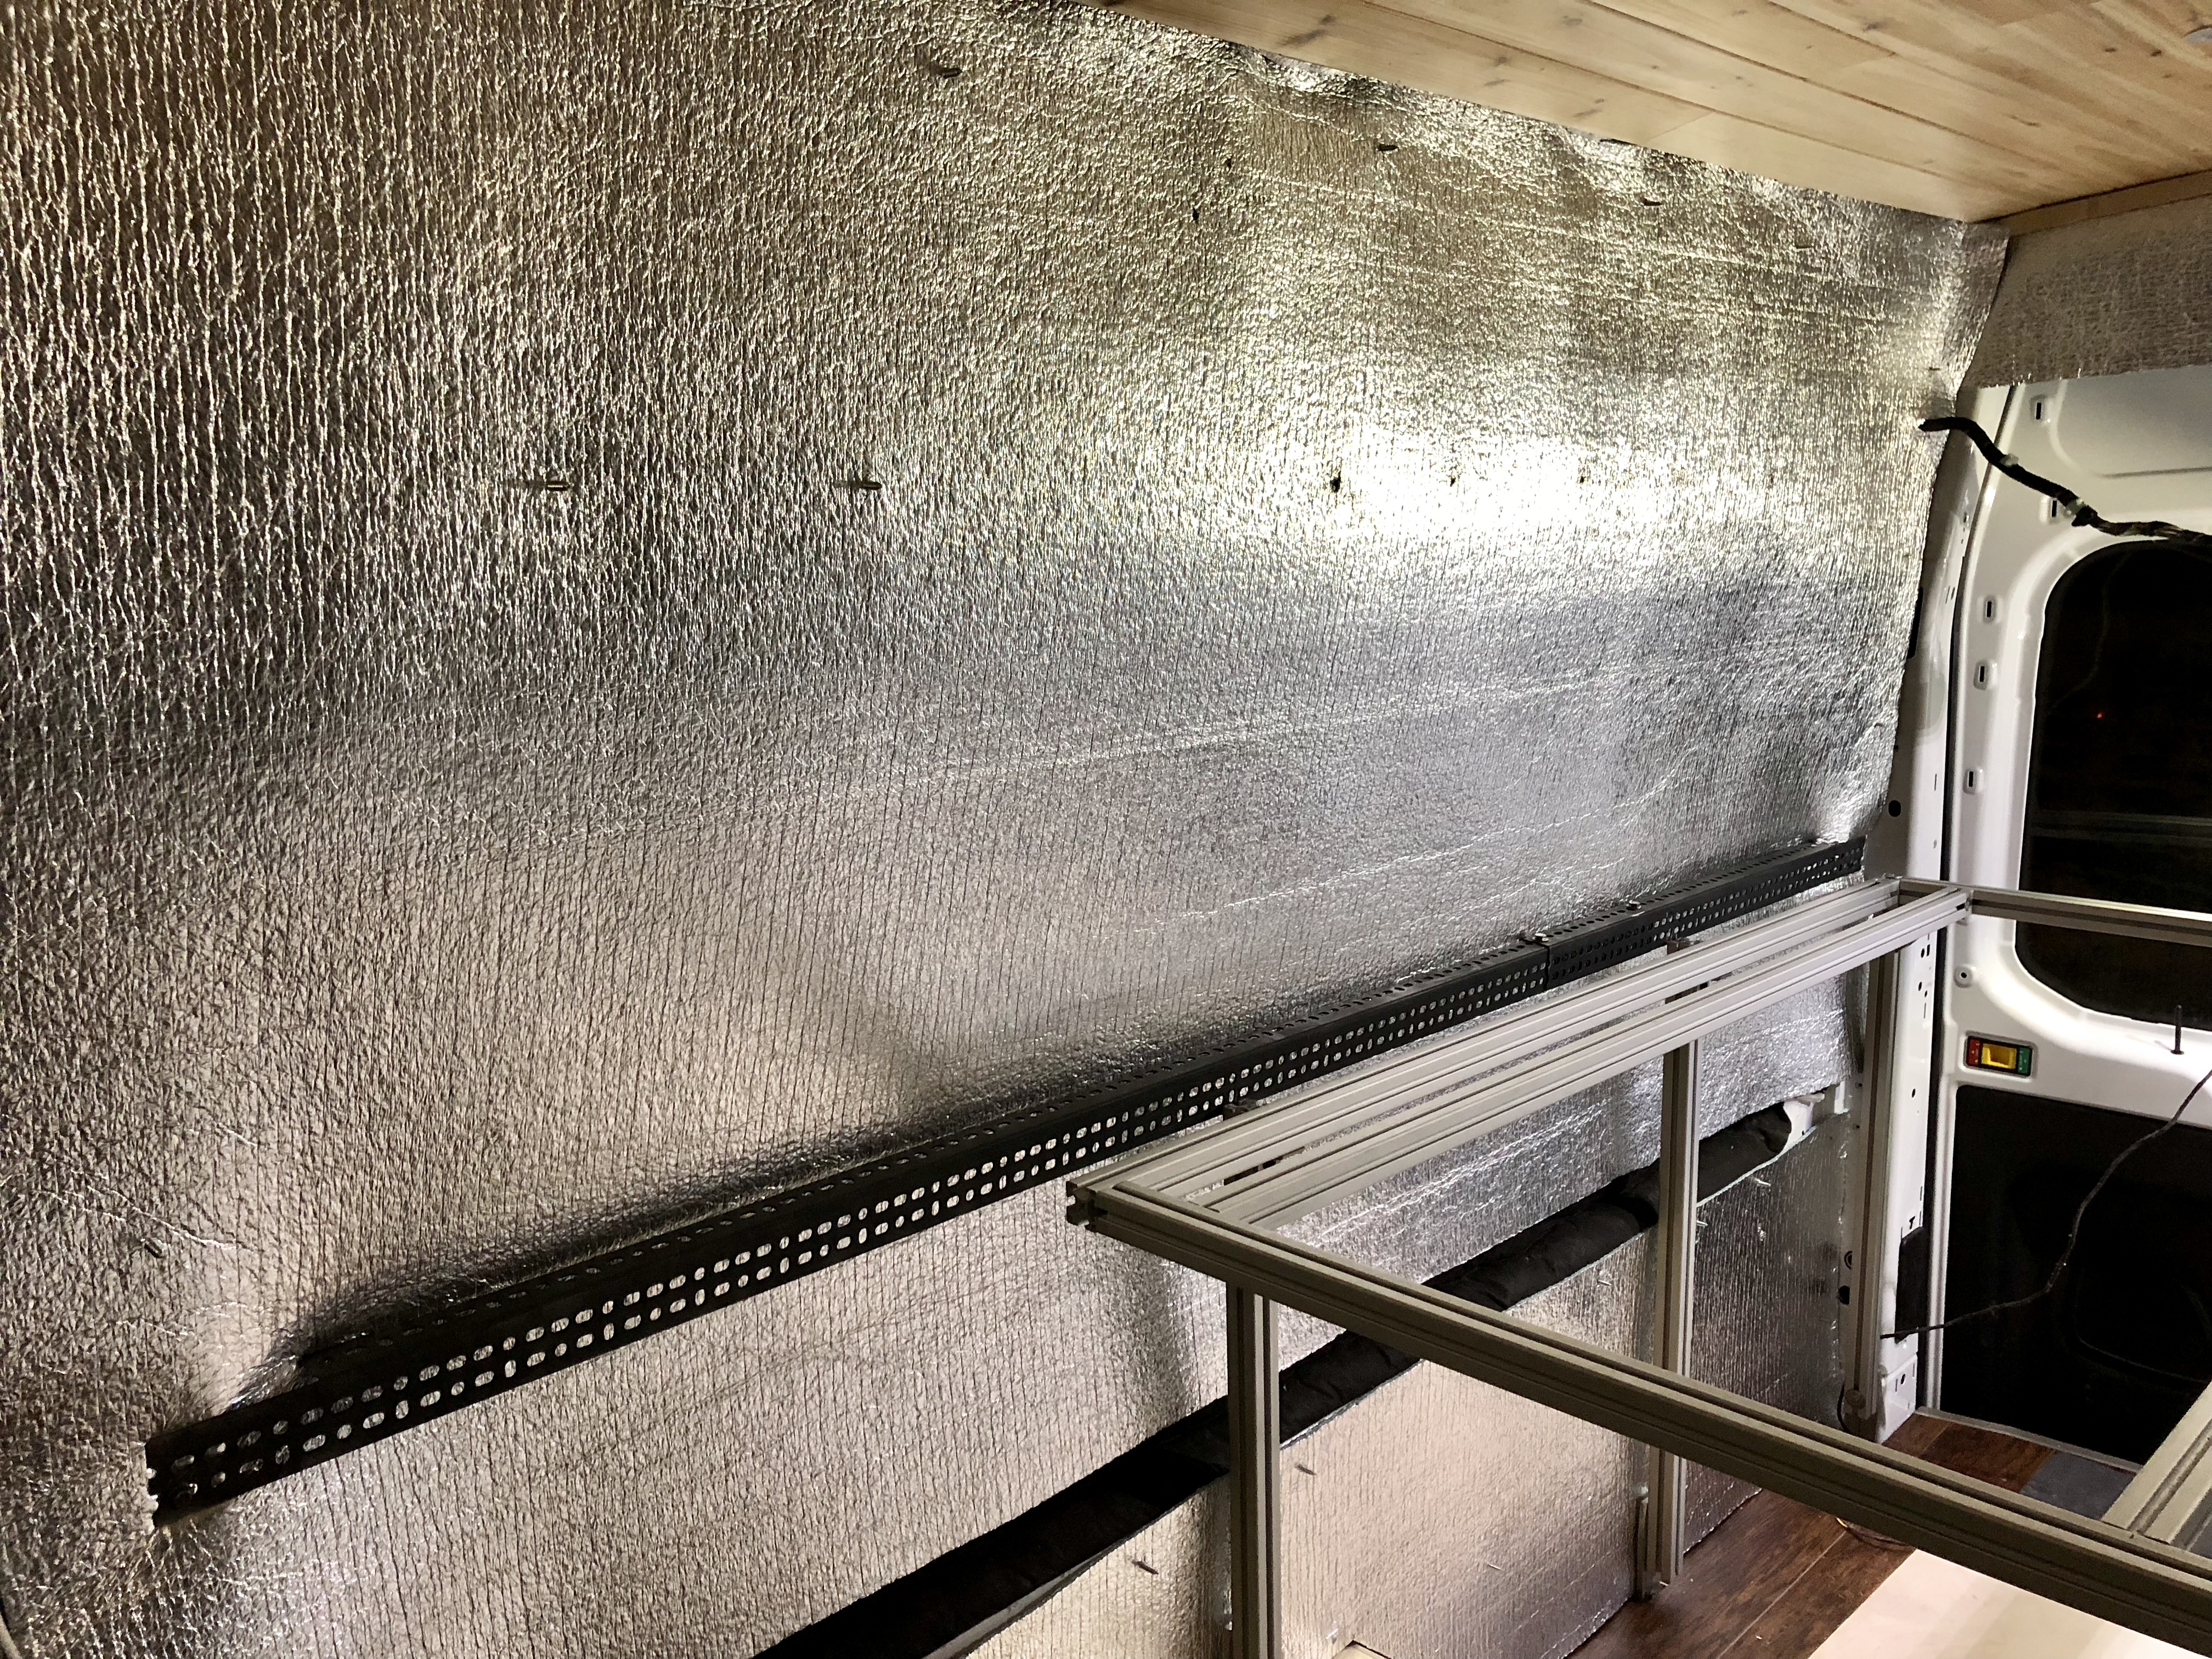
While we looked at the aluminum I also noticed some slotted angle iron – the kind with all the holes and slots in it. It is fairly heavy, but rigid and strong. We could only get 6′ lengths, but I figured that it was strong enough that it would not flex much, so that is what we went with. It only took 3.25 trips to the hardware store to get everything we needed (one trip we left the store, but before I actually put the van in gear I realized we needed some more hardware).

As it is steel and I don’t want it to rust, we painted it with some self-etching primer/paint. It was really cold in the garage so we needed to paint in the warm van. I don’t know how many brain cells I had left, but I have even fewer now. Wowie did we get high!

Painting the angle iron.

Drying while we got high.

The angle can only  go through the gap because we don’t it to stick out so it has to be flat where it gets bolted to the side of the van. A little angle grinder makes quick work of the … angle.

Bolting the two lengths together. They overlap about 1.5′.

As I might have mentioned somewhere, everything gets one more layer of insulation before the actual walls, so we also finished putting in plus-nuts into all the holes in the van we want to later bolt. Plus nuts are just a cool expanding metal device that fills a hole with a nut so you can bolt things to the van without creating a new hole. With that done Sara cut the reflectix to fit.

Now the problem is that all the plus-nuts we installed will be hidden behind the insulation. One of the other blogs we follow provided the solution to that problem – hanger bolts. Hanger bolts are bolts on one end and screws on the other. We put the bolt end into the plus-nut and the pointy screw end then sticks out. Align the reflectix where you want and then push – the screws pop right through and you now know where your nut is on the other side.

Here is the strap installed over the whole gap. You can see some of the hanger bolts sticking through the reflectix.

But wait, there’s more!

We also got stuck for the first time today! It snowed about 6″ last night and my parents’ driveway was super slick. When we backed out and turned onto the gravel road, we could not go forward. Every time I tried to move the back end just slid – dangerously close to a large hill/cliff.* We walked back up to the house trying to figure out what to use for traction. We ended with a metal floor mat and some old wire fencing. We piled those things up under the rear tires and it was just enough traction to straighten out and drive the rest of the way down the driveway. Tonight we ordered the tire chains we were planning to get as well as Tow Truck in a Box. For some strange reason you can get them at Menard’s for ridiculously cheap. If these don’t cut it, we’ll have to go with studded tires. Remember, they don’t salt the roads out here like New England – driving on ice is a regular activity here!

*I have a relationship with this hill/cliff. When I was a kid it was just grass in the middle – no trees except on the sides.

It is roughly 50 high total – a steep hill that ends in a 4′-8′ retaining wall. Our driveway used to come straight at the hill and then turn right at the top (that would be right to left in the picture above). When I was three years old I started at our garage and rode my big wheel as fast as I could. I rode down the hill and off the cliff onto the gravel road below. (I still believed I landed it clean and only crashed when I tried to power slide to a stop. I will admit that is unlikely.) That was probably my first concussion, but amazingly after many hours at the hospital having gravel picked out of my face I was pretty much okay.

Apparently not content with riding my Big Wheel off the hill, I was driving to high school one morning and fiddling with the radio. I didn’t quite make the whole turn and drove my parents’ Toyota van off the edge. Fortunately I was mostly around the corner (moving right to left in the photo) and the small trees caught the bumper and a bit of the driver door (Toyota van had no front end to speak of) and stopped me from rolling down the hill. The van was leaning close to 45 deg. and being held by small, wiry plum trees. I very gingerly climbed out the passenger window without setting it all loose. Our local tow-truck guy was pretty impressed, my mother not so much. He managed to pull the van back up to the driveway without losing it so no big deal. It’s all good.

Let there be light!

I couldn’t work on the van until the afternoon today and I dove into making sure the lights were installed correctly. I picked up a small 12V battery so I could test the wiring we did yesterday and finish the other four lights today. Unfortunately, my testing showed the stupid splice connectors we used suck. I had feared this a little because I don’t think the wire coming from the lights is the same gauge as the 18ga wire running from the lights to the switch. Sure enough, the light that was spliced in with the connector did not work.

We have two sets of four lights and each will be controlled with its own 12V LED dimmer switch. The four lights over the bed will be switched on the driver wall behind the refrigerator. The four lights over the galley will be switched on the passenger wall behind the stove.

So, each pair of lights at the same point in the van get connected with a wire running across the van and then those two wires get connected before the switch. This means I need to splice one light into the other for each pair and then one set of two lights into the other set of two lights. Three splices total.

In some of my sleepless hours last night I had watched a YouTube video on how to splice wires inline to existing wires. I figured that technique would work. It isn’t that hard and I am pleased with the results. I used the technique for both pairs of lights and then to join the two pairs to form the 4-light set.

Here is how it works using. These pictures show the last splice joining the two wires that each feed two lights. This splice is in the middle of the SO cord (insulated wire pair) so I had to remove the insulation and then strip the wire.

Step 1: Buy a new stripping tool that can strip wires in the middle of the wire. Fortunately I was able to get one on my first trip of the day to Ace.

Step 2: Strip a section of wire in the place where you want to add your incoming wire. In this picture I have also already stripped/removed a section of the insulation. It would have been a bit easier if I had stripped a little more insulation.

Step 3: Use something pointy to carefully divide the wires in half.


Step 4: Strip a good 1.5″ on the wire you are going to splice in. Insert that exposed wire into the gap you created.

Step 5: Hold the two wires together and tightly wrap the end of the wire around the area of stripped wire you exposed. Here I have already wrapped the negative and partly wrapped the positive.

Step 6: Wrap it up in good electrical tape. The internets recommended at least three wraps. You can solder the connection if you want, but this method does make a very strong connection. I messed up a few of the wires on one of the splices (not pictured!) so I did add solder. Of course, I barely know what the heck I am doing using solder so it is not all that likely I improved my splice!

Step 7 (Optional): If you have access to one of the ends of the wire you can slide some shrink tubing over the connection.

You can see I did the same thing to add the lights. It seems like an especially good technique for joining two wires when they are not exactly the same size. Because I was also connecting two wires here using butt connector I slid some shrink tubing on these as well.

Boom! Lights!

Ceiling finished. Time to play!

Sort of. The very last board on each side in the front is not going to go in without a serious fight. As it stands we can’t get them in without either breaking something or cutting something major so we backed off. Both boards are short and will likely be covered by either trim, cabinets, or some foam blocks that cover the side curtain airbags. We are definitely calling it done for now! All of the supports are still up until the glue *really* sets, but it looks nice.

With that finished I also took a bit of time to install the floor trim on the rear door. This was a little more complicated than the slider door because the rear door arcs. I ended up cutting five pieces of trim with a few degrees of angle to wrap around the curve.

My dad came by to check on our progress so we have a couple group photos. Here Sara and I are deciding which board is going to go in.

Installing one of the last boards.

Wall to wall ceiling!

Measuring one of the rear trim pieces.

Trim installed. It looks nice, but I’m not sure the effort to extend the floor all the way to the end and make it look nice was worth it! It definitely added quite a bit of extra time compared with most builds that just end the floor short of the rear doors. Also, we didn’t bother at the time to cut a hole to access the spare tire mechanism so now we have to find where to drill the hole. Probably should have just done that when it was visible!

With things essentially finished on that project we owed the dogs a nice walk. We also wanted to get a Christmas tree for the van. So, we headed out to the snow to play. My dad came along because he wanted to get some sunset photos at a park up in the hills above La Grande.

Setting up the family photo.

Explaining to the pups how they needed to behave.

Family photo with the van Christmas tree!

Tanzi posing with Sara.

Kenai just posing for the sunset.


We almost have a ceiling over our heads!

The ceiling work actually went pretty well today. The planks on the curves at the front went in a lot better than yesterday. When the first one slid right in we looked at each other in amazement. I don’t know if we got better or if the curve lessened, but I don’t care, it was much less frustrating. Most importantly, we are almost done! The back 38″ IS done! The middle needs another plank, and the front needs two or three planks to the edge. The edge will be covered by cabinets and/or trim pieces so we only have to get close. It really looks fantastic and although there are some places we will always look at be reminded of the mistakes we made, I’m sure we will be happy with how it turns out.

We did get somewhat sidetracked today by preparing and installing the lights. We are using eight LED lights recessed in the ceiling. The lights are super low profile and snap nicely into holes in the 1/4″ cedar. I was a little worried about how the 2 3/8″ hole saw would cut the planks, but it cut very clean.

The front four lights in the galley will be on one 12V LED dimmer switch and the back four over the bed will be on a second dimmer switch. We used regular butt-connectors to attach the LED wires to red/yellow 18ga automotive wire on one light and then ran it over to the light next to it. There we used splice connectors to add in the second light. The wire between the two is wrapped in fabric friction tape. After the splice the wire connects to Ancor 18ga SO cord, which acts as a conduit through the wall to the switch (or where the switch will be some day).

Sara learning to crimp butt connectors. Let’s just say we went through quite a few and not all of the mistakes were Sara’s!

Wrapping the crossover wire in friction tape.

Installing the lights.

Connecting the SO cord.


Looking at the back with wall-to-wall ceiling!

Of course, there are still some braces making sure it is tight as the adhesive sets.

Looking at the front. Still a little work to do, but we are so close!

Fingers crossed we will have a finished ceiling tomorrow!